NetOps Monitoring
From WIKI - ACD.net
Revision as of 23:48, 29 November 2012 by Carlson-lynch (Talk | contribs)
Contents |
Getting Started
Verify Account Contacts
- If you want to receive email or sms notifications regarding the status of your monitored hosts, you will need to make sure that the email address and/or mobile number is tied to a contact on your customer account.
- To add or change an account contact from myaccount.acd.net click Manage Contacts on the left hand menu. You can then Edit, Delete, or Add New Contact
Entering NetOps Monitoring
- Once you have your contacts set, you can access NetOps Monitoring by clicking the link NetOps Monitoring on the left hand menu.
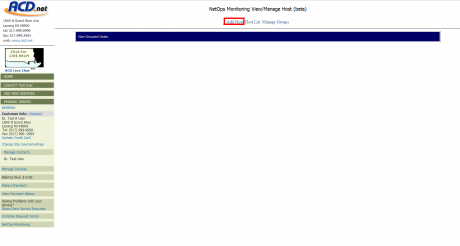
- The first page you will see will be your Host List if this is the first time you've used NetOps Monitoring, your list will be empty and you will just see a bar labelled Non-Grouped Hosts. Your monitored hosts will be displayed here once you've added them.
Adding A Host
- Once in the NetOps Monitoring section of myaccount.acd.net, click the Add Host link at the top of the page.
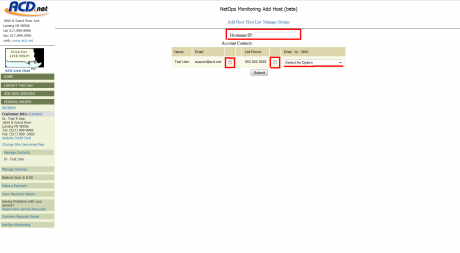
- In the Hostname/IP text field, enter the hostname or IP address of the host you want to monitor.
- Under Account Contacts: you will see the Name of the contact from your customer account contacts, accompanied by their Email Addressand Cell Phone, each with a checkbox to the right. You will also see, next to the Cell Phone checkbox, a drop down menu under Email - to - SMS containing a list of common email-to-sms extensions used by providers.
- For each account contact who should receive notifications regarding the state of the monitored host, click the checkbox next to the desired contact method (you can select both Email and Cell Phone for any contact).
- If you've selected the Cell Phone number as a contact method, please use the Email - to - SMS dropdown menu to select the email-to-sms extension used by your cellular service provider. If you do not know what extension they use, the information should be available on your providers website or can usually be obtained by contacting their support department.
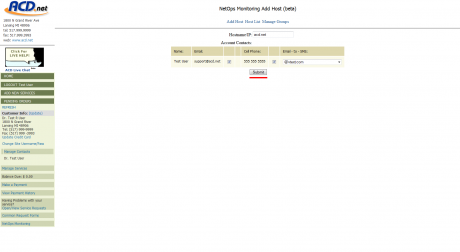
- Once you've entered the IP or hostname of the host, and chosen your desired contacts and contact methods (you can choose no contacts initially and add them later) click the Submit button to add the host to our NetOps Monitoring system.
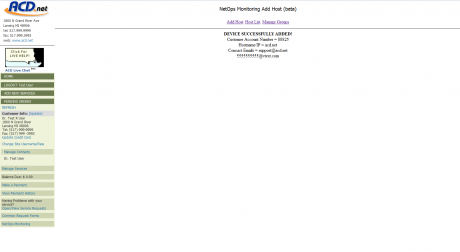
- You will see a notification page confirming that the device was successfully added. You can then click Host List to return.
- The information for your new host may not display right away but within a few minutes it should be available.
Creating A Group
- To add a group, click the Manage Groups link at the top of the page.
- From the Manage Groups page, fill in the Group Name field at the top and click Add Group to add the group.


