Webmail Tutorial
From WIKI - ACD.net
Contents |
The ACD.net Webmail System
Welcome to the new ACD.net webmail system. The following tutorial will assist you in navigating the new interface.


Toolbar Icons
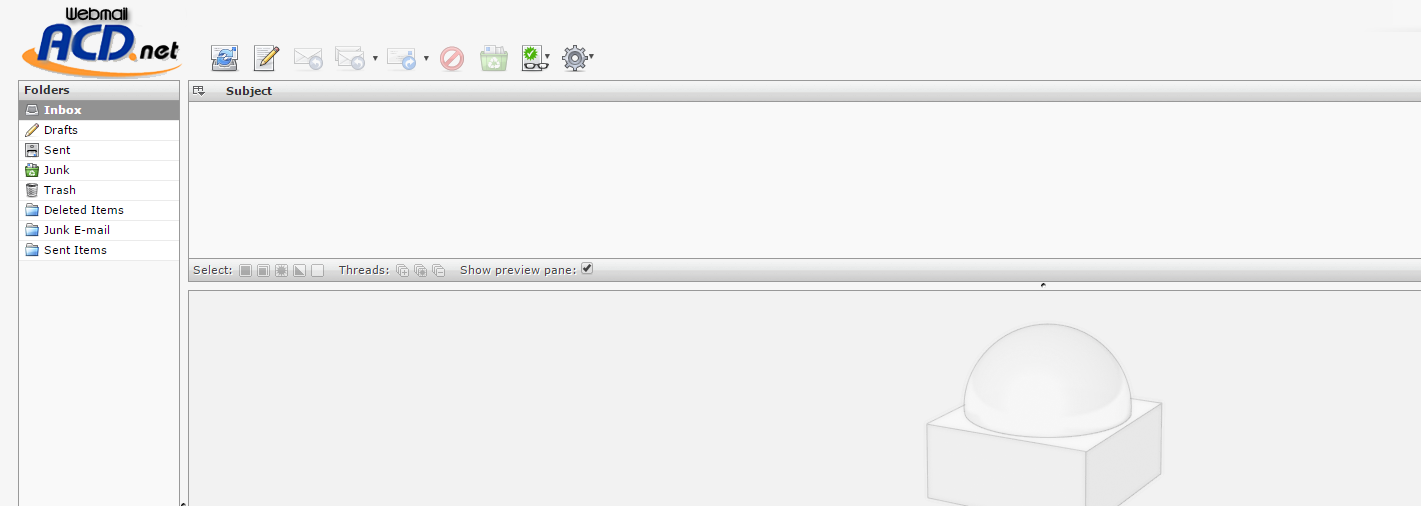
To the top left of the interface, next to the ACD.net logo you will see the toolbar.

- If you cannot see these icons next to the ACD.net logo, you may have java disabled or you may need to upgrade your web browser.
1. Check for new messages
- Clicking this will check for new messages in your Inbox.
2. Create a new message
- Clicking this allows you to compose a new email message
3. Reply to sender
- Clicking this allows you to reply to a message you have selected.
4. Reply to sender and all recipients
- Clicking this will allow you to reply to all recipients on a message you have selected which was sent to more than one party.
5. Forward the message
- Click this to forward the message you have selected.
6. Move message to trash
- Click this to move the selected message or messages from the current folder to the folder you have designated as the Trash folder.
7. Mark as Junk
- Click this to mark messages as Junk/Spam folder.
8. Mark messages
- Clicking this opens a drop-down list that gives you the option to mark the selected message or messages:
- 1. As read
- 2. As unread
- 3. As flagged
- 4. As unflagged
9. More actions
- Clicking this opens a drop-down list that gives you the following options:
- 1. Print this message
- 2. Download (as a .eml file)
- 3. Edit as new
- 4. This will open the selected message and edit it as if it were a new message.
- 5. Show source
- Will show you the html source code of the email along with the message headers.
Menu Icons
- Clicking on this will take you back to the email interface when you are in another section.
2. Address Book
3. Settings
4. Logout
5. Search Bar
- This search bar allows you to search through the emails in a folder by email address and/or by subject line
Configuration
There are a few things you will want to configure initially to ensure optimal performance of the webmail client.
Setting Up Special Folders
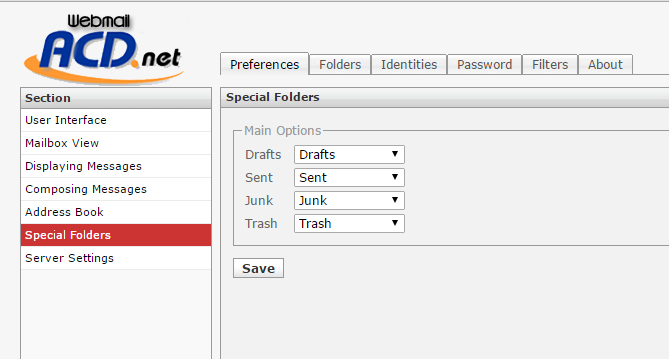
- Select Settings from Menu Icons.
- Select Special Folders from the list of options on the left hand side of the screen.
- In Special Folders you will see four drop down menus:
- From here you can designate which of your folders you would like to use for the various functions.
- Once the special folders are configured just the way you want, click Save.

