Webmail Tutorial
From WIKI - ACD.net
(Difference between revisions)
Mckee.robert (Talk | contribs) |
(→Setting Up Special Folders) |
||
| (9 intermediate revisions by 2 users not shown) | |||
| Line 1: | Line 1: | ||
=The ACD.net Webmail System= | =The ACD.net Webmail System= | ||
| − | + | Welcome to the new ACD.net webmail system. The following tutorial will assist you in navigating the new interface.<br><br> | |
| − | + | [[File:Webmaillgin.png]]<br><br> | |
| − | Welcome to the new ACD.net webmail system. The following tutorial will assist you in navigating the new interface. | + | [[File:Webmail2.png]]<br><br> |
==Toolbar Icons== | ==Toolbar Icons== | ||
To the top left of the interface, next to the ACD.net logo you will see the toolbar.<br><br> | To the top left of the interface, next to the ACD.net logo you will see the toolbar.<br><br> | ||
| − | [[File: | + | [[File:Webmailtoolbar2-1.png]]<br><br> |
*If you cannot see these icons next to the ACD.net logo, you may have java disabled or you may need to upgrade your web browser. | *If you cannot see these icons next to the ACD.net logo, you may have java disabled or you may need to upgrade your web browser. | ||
'''1. Check for new messages''' | '''1. Check for new messages''' | ||
| Line 12: | Line 12: | ||
:Clicking this allows you to compose a new email message | :Clicking this allows you to compose a new email message | ||
'''3. Reply to sender''' | '''3. Reply to sender''' | ||
| − | : | + | :Clicking this allows you to reply to a message you have selected. |
'''4. Reply to sender and all recipients''' | '''4. Reply to sender and all recipients''' | ||
| − | : | + | :Clicking this will allow you to reply to all recipients on a message you have selected which was sent to more than one party. |
'''5. Forward the message''' | '''5. Forward the message''' | ||
:Click this to forward the message you have selected. | :Click this to forward the message you have selected. | ||
'''6. Move message to trash''' | '''6. Move message to trash''' | ||
:Click this to move the selected message or messages from the current folder to the folder you have designated as the '''Trash''' folder. | :Click this to move the selected message or messages from the current folder to the folder you have designated as the '''Trash''' folder. | ||
| − | '''7. Mark messages''' | + | '''7. Mark as Junk''' |
| − | :Clicking this opens a drop-down list that gives you the option to mark the selected message or messages: | + | :Click this to mark messages as '''Junk/Spam''' folder. |
| + | '''8. Mark messages''' | ||
| + | :Clicking this opens a drop-down list that gives you the option to mark the selected message or messages:<br><br> | ||
:'''1. As read''' | :'''1. As read''' | ||
:'''2. As unread''' | :'''2. As unread''' | ||
:'''3. As flagged''' | :'''3. As flagged''' | ||
| − | :'''4. As unflagged''' | + | :'''4. As unflagged'''<br><br> |
| − | ''' | + | '''9. More actions''' |
| − | :Clicking this opens a drop-down list that gives you the following options: | + | :Clicking this opens a drop-down list that gives you the following options:<br><br> |
:'''1. Print this message''' | :'''1. Print this message''' | ||
:'''2. Download (as a .eml file)''' | :'''2. Download (as a .eml file)''' | ||
| Line 50: | Line 52: | ||
*Select '''Settings''' from '''Menu Icons'''. | *Select '''Settings''' from '''Menu Icons'''. | ||
*Select '''Special Folders''' from the list of options on the left hand side of the screen. | *Select '''Special Folders''' from the list of options on the left hand side of the screen. | ||
| − | *In '''Special Folders''' you will see four drop down menus:<br> | + | *In '''Special Folders''' you will see four drop down menus:<br><br> |
| − | [[File: | + | [[File:Specialfolders.png]]<br><br> |
*From here you can designate which of your folders you would like to use for the various functions. | *From here you can designate which of your folders you would like to use for the various functions. | ||
*Once the special folders are configured just the way you want, click '''Save'''. | *Once the special folders are configured just the way you want, click '''Save'''. | ||
Latest revision as of 13:19, 11 May 2015
Contents |
[edit] The ACD.net Webmail System
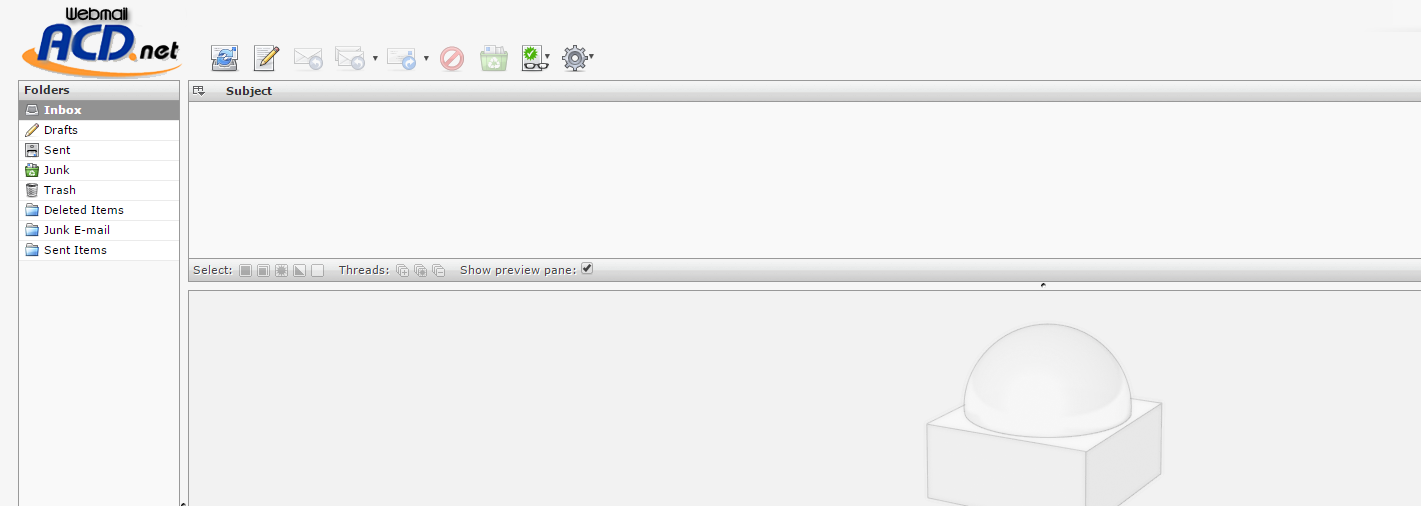
Welcome to the new ACD.net webmail system. The following tutorial will assist you in navigating the new interface.


[edit] Toolbar Icons
To the top left of the interface, next to the ACD.net logo you will see the toolbar.

- If you cannot see these icons next to the ACD.net logo, you may have java disabled or you may need to upgrade your web browser.
1. Check for new messages
- Clicking this will check for new messages in your Inbox.
2. Create a new message
- Clicking this allows you to compose a new email message
3. Reply to sender
- Clicking this allows you to reply to a message you have selected.
4. Reply to sender and all recipients
- Clicking this will allow you to reply to all recipients on a message you have selected which was sent to more than one party.
5. Forward the message
- Click this to forward the message you have selected.
6. Move message to trash
- Click this to move the selected message or messages from the current folder to the folder you have designated as the Trash folder.
7. Mark as Junk
- Click this to mark messages as Junk/Spam folder.
8. Mark messages
- Clicking this opens a drop-down list that gives you the option to mark the selected message or messages:
- 1. As read
- 2. As unread
- 3. As flagged
- 4. As unflagged
9. More actions
- Clicking this opens a drop-down list that gives you the following options:
- 1. Print this message
- 2. Download (as a .eml file)
- 3. Edit as new
- 4. This will open the selected message and edit it as if it were a new message.
- 5. Show source
- Will show you the html source code of the email along with the message headers.
[edit] Menu Icons
- Clicking on this will take you back to the email interface when you are in another section.
2. Address Book
3. Settings
4. Logout
5. Search Bar
- This search bar allows you to search through the emails in a folder by email address and/or by subject line
[edit] Configuration
There are a few things you will want to configure initially to ensure optimal performance of the webmail client.
[edit] Setting Up Special Folders
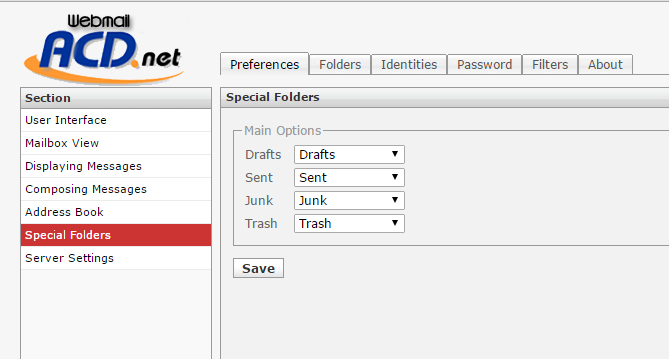
- Select Settings from Menu Icons.
- Select Special Folders from the list of options on the left hand side of the screen.
- In Special Folders you will see four drop down menus:
- From here you can designate which of your folders you would like to use for the various functions.
- Once the special folders are configured just the way you want, click Save.

